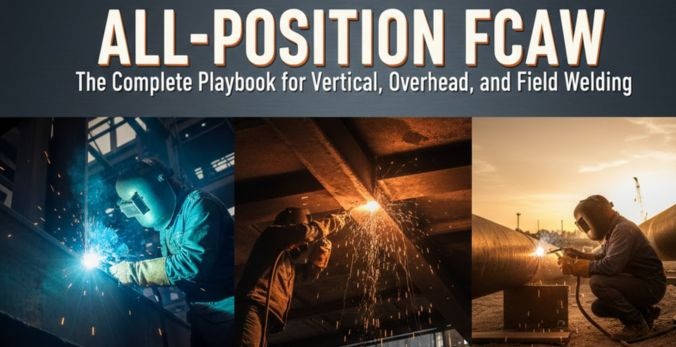
All-Position FCAW: The Complete Playbook for Vertical, Overhead, and Field Welding
Step-by-step guide on mastering FCAW in challenging orientations, reducing the need for repositioning work and rework—critical for shipbuilding and infrastructure projects.
1/9/202615 min read
Step-by-step guide on mastering FCAW in challenging orientations, reducing the need for repositioning work and rework critical for shipbuilding and infrastructure projects.
In fabrication shops, you can rotate a workpiece into position. But in shipbuilding yards, on bridge construction sites, and during field repairs, the work doesn't rotate for your convenience. When a weld joint sits vertically or overhead on a fixed structure, you adapt, or you fail the inspection. All-position Flux-Cored Arc Welding (FCAW) transforms these challenges from bottlenecks into opportunities for productivity gains. This guide delivers the technical knowledge welders need to execute vertical, overhead, and field welds consistently, with minimal repositioning and reduced rework.
Why All-Position FCAW Capability Changes the Game
The ability to weld in all positions without stopping to reposition heavy structural members directly impacts project economics. On large infrastructure projects and in shipbuilding, repositioning work represents dead timecranes idling, crews waiting, schedules slipping. When welders master all-position FCAW techniques, they eliminate repositioning delays and maintain continuous production flow.
FCAW's all-position capability stems from its high deposition rate combined with controllable puddle characteristics. The flux core generates protective slag that, when properly managed, supports the weld pool against gravity. Unlike solid wire processes that struggle in out-of-position applications, FCAW maintains spray transfer characteristics even at lower currents, producing reliable fusion across all orientations. This versatility allows fabricators to complete complex assemblies faster than stick welding while maintaining comparable strength.
In shipbuilding specifically, hull assembly involves thousands of linear feet of welding in vertical and overhead positions on fixed steel plates. Each hour saved through efficient all-position welding multiplies across the entire build schedule. Similarly, infrastructure projects like bridges and high-rises demand overhead and vertical welding on girders and columns that cannot be moved. Mastering these positions separates competent welders from those who consistently pass certification tests and deliver production-quality work under real-world constraints.
Understanding Wire Selection and Polarity Requirements
Selecting the correct flux-cored wire determines whether your all-position welds succeed or require grinding out. Two fundamental wire types exist: self-shielded (FCAW-S) and gas-shielded (FCAW-G), each with distinct position capabilities and polarity requirements.
Self-Shielded FCAW for Field Conditions
Self-shielded wires generate their own protective atmosphere, making them ideal for outdoor field welding where wind disrupts external shielding gas. Common self-shielded electrodes like E71T-11 operate on DCEN (DC electrode negative) polarity and perform reliably in all positions. The wire's flux formulation creates sufficient gas shielding to protect the puddle from atmospheric contamination, even in breezy conditions that would destroy a gas shield.
For vertical-up welding, self-shielded wires rated for all-position use typically operate between 150-200 amps with voltages ranging from 21-26V, depending on wire diameter. These wires produce heavier slag systems that require more deliberate slag removal between passes, but the trade-off is unmatched field versatility. When welding overhead in shipyards or on construction sites, self-shielded wire eliminates the liability of gas cylinders and hoses while maintaining weld quality.
Gas-Shielded FCAW for Controlled Environments
Gas-shielded flux-cored wires combine internal flux with external CO₂ or 75/25 argon-CO₂ shielding gas, operating on DCEP (DC electrode positive) polarity. These wires produce smoother arc characteristics, flatter bead profiles, and higher deposition rates than self-shielded alternatives. For shop-based fabrication and indoor structural work, gas-shielded FCAW delivers superior productivity.
Typical gas-shielded wire specifications for all-position welding include E71T-1 and E71T-9, both rated for vertical-up and overhead applications. Operating parameters generally range from 180-240 amps at 24-28V for 0.045-inch diameter wire in vertical positions. The external gas shield at 35-45 CFH flow rate protects the weld more consistently than self-shielded flux alone, resulting in fewer porosity issues and cleaner radiographic results.
Polarity errors cause immediate problems. Running self-shielded wire on DCEP or gas-shielded wire on DCEN produces erratic arcs, excessive spatter, and compromised penetration. Before striking an arc, verify your machine polarity matches the wire manufacturer's specifications. This simple check prevents wasted consumables and scrapped welds.
Vertical-Up Welding: Building a Shelf
Vertical-up progression remains the standard for structural welds on material thicker than 3/16 inch because it provides superior penetration and fusion compared to vertical-down techniques. The challenge lies in preventing molten metal from running down the joint while maintaining adequate heat input for fusion.
Parameter Adjustments for Vertical-Up
Reduce voltage and amperage by 10-15 percent from your flat-position baseline settings. This reduction decreases puddle fluidity, allowing the weld pool to solidify faster and resist gravitational pull. For 0.045-inch diameter wire that runs at 200 amps and 27V in flat position, dial down to approximately 175-185 amps and 24-25V for vertical-up work. This cooler setting creates a more viscous puddle that stacks rather than sags.
Wire feed speed directly controls amperage in FCAW. When transitioning to vertical-up, reduce wire feed speed proportionally with your voltage reduction. If you were running 400 IPM in flat position, drop to 340-360 IPM for vertical work. Monitor the weld bead as it forms—if the puddle drips or elongates downward, you're running too hot. Conversely, if the bead appears humped and narrow with poor tie-in at the toes, increase heat slightly.
Gun Angle and Manipulation Technique
Maintain a slight push angle of 5-15 degrees from perpendicular when welding vertical-up. This contrasts with the drag angle used in flat and horizontal positions. The push angle directs arc force into the joint and prevents slag from rolling ahead of the puddle, which would cause slag inclusions.
Use a controlled weave or whip-and-pause technique to manage the puddle. The weave width should not exceed two to two-and-a-half times the wire diameter. Move upward in small increments, pausing momentarily at each toe to fill the edges and prevent undercut. The pause allows the puddle to wet out and the slag to flow behind the arc, not ahead of it.
Travel speed becomes critical in vertical-up welding. Move too slowly and the puddle overtakes the arc, trapping slag. Travel too quickly and you'll create insufficient fusion with inadequate penetration. The correct speed produces a consistent shelf with each upward step—the previous increment solidifies enough to support the next addition of filler metal. Listen to the arc: a steady, crackling sound indicates proper parameters and travel speed.
Stickout Management
Maintain consistent electrode extension (stickout) between 1/2 to 3/4 inch for 0.045-0.052 inch wire diameters. Excessive stickout increases resistance heating in the wire, raising voltage and lowering amperage—exactly the opposite effect you want in vertical welding. This shifts your carefully set parameters out of range and can result in lack of fusion or cold lap defects.
Keep your gun nozzle close to the work, approximately 1/4 to 1/2 inch away. This proximity ensures proper gas coverage for gas-shielded wire and maintains your target stickout distance. As you progress up the joint, resist the tendency to pull away from the work—maintain that close working distance throughout the entire weld.
Vertical-Down: When Speed Matters
Vertical-down welding suits thin materials (under 3/16 inch) where rapid travel speed and reduced heat input prevent burn-through. This technique finds application in sheet metal fabrication, automotive repair, and certain pipeline applications where material thickness allows faster progression.
The vertical-down technique inverts the travel direction-you weld from top to bottom. This orientation allows gravity to assist rather than fight the weld pool movement. However, the trade-off is reduced penetration compared to vertical-up. For critical structural welds requiring full penetration and maximum strength, vertical-down is inappropriate regardless of convenience.
Increase travel speed significantly in vertical-down-often twice the speed used for vertical-up on the same material. The faster travel keeps the heat-affected zone small and prevents excessive melt-through on thin base metal. Use a drag angle of 10-20 degrees and a straight drag motion without weaving. Weaving in vertical-down creates excessive heat buildup and increases the risk of slag entrapment.
Parameter settings for vertical-down mirror flat-position settings or may even slightly exceed them. The increased travel speed offsets the higher heat input, creating a narrow, shallow bead suitable for thin material joining. This technique will not pass structural welding codes that require specific penetration depth, so understand your application requirements before selecting vertical-down as your approach.
Overhead Welding: Controlling the Inverted Puddle
Overhead welding represents the most physically demanding and technically challenging position. Gravity constantly pulls molten metal away from the joint, attempting to create drips, sagging beads, and incomplete fusion. Success requires precise parameter control, correct gun angles, and disciplined technique.
Heat and Parameter Control
Further reduce your heat input for overhead work—typically 15-20 percent below flat-position settings. For wire running at 200 amps and 27V in flat position, dial down to 165-180 amps and 24-26V for overhead applications. This cooler setting minimizes puddle fluidity and reduces the volume of molten metal fighting gravity at any moment.
Keep the weld puddle small. A large, fluid puddle will sag or drip regardless of technique. The small puddle solidifies quickly, creating a series of overlapping ripples that build the bead profile without excessive reinforcement. If you see the puddle beginning to elongate or form droplets, immediately reduce amperage or increase travel speed to shrink the puddle size.
Gun Positioning and Work Angle
Maintain a drag angle of 15-25 degrees from perpendicular for overhead welding. This angle directs the arc force into the joint while allowing you visibility of the puddle formation. The contact tip should position approximately 5-10 degrees past perpendicular to help control metal transfer.
For fillet welds in overhead position, use a work angle of 45 degrees to split the heat between both legs. Adjust this angle slightly during the weld to direct heat toward the plate requiring more penetration but return to 45 degrees as your baseline. This dynamic angle adjustment becomes second nature with practice and prevents the common defect of unequal leg length in overhead fillets.
Electrode manipulation in overhead position should be minimal. Excessive weaving increases puddle size and elevates the risk of sagging. Use a slight side-to-side motion-no wider than the wire diameter-or employ a straight stringer technique. The tighter manipulation keeps the puddle manageable and the bead profile flat.
Stickout and Arc Length
Overhead welding demands shorter stickout than other positions—maintain 3/8 to 1/2 inch for small diameter wires. The shorter stickout increases amperage slightly, providing better penetration to counteract the reduced wetting action caused by gravity pulling the puddle away from the base metal. However, don't go so short that you risk burnback or lose visibility of the puddle.
Monitor your arc length continuously. Too long an arc in overhead position creates spatter, reduces penetration, and destabilizes the spray transfer mode. The arc should sound sharp and focused—a soft, hissing arc indicates excessive length. Shorten your stickout or reduce voltage if the arc sounds wrong.
Field Welding Considerations: Wind, Access, and Joint Variability
Field conditions amplify every challenge present in shop welding. Wind, temperature extremes, limited access, and inconsistent joint preparation require adaptive techniques and robust process selection.
Wind Compensation Strategies
Wind disrupts gas shielding, causing porosity and wormhole defects in gas-shielded FCAW. At wind speeds above 5 mph, implement wind protection. Position welding screens or tarps upwind of the weld joint to create a sheltered work zone. Even moderate air movement can blow away CO₂ shielding, particularly in overhead positions where the gas must work against buoyancy.
When permanent wind barriers are impractical, switch to self-shielded flux-cored wire. Self-shielded electrodes tolerate wind conditions that completely defeat gas-shielded processes. The performance trade-off includes slightly rougher bead appearance and heavier slag, but these are acceptable compromises when weather prevents gas-shielded welding.
Increase shielding gas flow rates by 10-15 percent in moderately windy conditions, but recognize that excessive flow creates turbulence that actually reduces shielding effectiveness. Flow rates above 50 CFH often cause more problems than they solve by creating eddy currents that draw atmospheric contamination into the arc zone. Find the balance through test welds before committing to production welding.
Access Limitations and Body Positioning
Field welds often occur in positions where you cannot achieve ideal body posture or gun access angles. Bridge girder welding, ship double-hull fabrication, and pressure vessel assembly all present situations where standard techniques require modification. Practice maintaining stable gun angles while kneeling, lying supine, or reaching through restricted openings.
When gun access prevents maintaining the proper drag or push angle, prioritize work angle over travel angle. The work angle (positioning the wire relative to the joint cross-section) determines heat distribution and fusion. Travel angle affects bead shape and slag behavior but has less impact on fundamental weld integrity. If you must compromise one angle due to access restrictions, maintain correct work angle and accept suboptimal travel angle.
Electrode extensions longer than standard shop practice become necessary in tight access situations. Extended stickout increases resistance heating and alters your effective amperage. Compensate by increasing wire feed speed 10-20 percent to maintain target amperage at the arc. Test your adjusted parameters on a mock-up before welding on the actual structure.
Joint Preparation Variability
Field fit-up rarely matches shop quality. Gaps vary, root openings change, and alignment shifts from one end of the joint to the other. FCAW tolerates these variations better than many processes, but technique adjustments remain necessary.
For excessive root gaps in vertical welds, use a weave technique to build up both toes before filling the center. This bridges the gap and prevents burn-through. Reduce travel speed proportionally—a wider gap requires more fill time per linear inch of joint. If gaps exceed your wire's bridge-welding capability (generally 1.5 times wire diameter), request rework or add a backing bar.
When joint alignment creates varying groove angles or unequal land dimensions, adjust your work angle dynamically to direct heat toward the thicker section or wider gap. This compensates for uneven heating and ensures both sides of the joint receive adequate fusion. The ability to make these real-time adjustments separates field-ready welders from those who only succeed with perfect shop fit-up.
Common Mistakes and Avoidance Strategies
Certain defects appear repeatedly in all-position FCAW work, often with predictable root causes. Understanding these failure modes and their prevention saves hours of grinding and rewelding.
Slag Inclusions
Slag trapped in the weld metal creates planar discontinuities that fail radiographic inspection and reduce joint strength. Four primary causes produce slag inclusions: incorrect bead placement in multi-pass welds, improper travel angle or speed, insufficient heat input, and inadequate inter-pass cleaning.
In multi-pass vertical welding, provide sufficient space in the groove for subsequent passes. If your root pass fills the joint to the point where the second pass cannot access the joint toes, slag entrapment becomes inevitable. Plan your bead size and sequence to maintain weld accessibility throughout the joint fill.
Travel speed directly impacts slag behavior. Too slow and the puddle overtakes the arc, allowing slag to flow ahead and become entrapped. Too fast and the slag cannot float to the surface before the weld metal solidifies. The correct speed keeps slag behind the advancing arc where it can float to the surface as the weld cools.
Clean thoroughly between passes with a chipping hammer and wire brush. Visual inspection of the cleaned bead should show bright metal with no slag islands or discoloration. Any slag remaining on a completed pass will incorporate into the next pass, creating an inclusion. This discipline becomes even more critical in vertical and overhead positions where slag has less opportunity to float clear of the weld metal.
Porosity and Wormholes
Gas porosity appears as rounded voids in the weld cross-section, while wormholes present as elongated gas tunnels. Both defects result from trapped gas—either from inadequate shielding or contamination in the base metal or consumables.
Remove rust, paint, oil, grease, and moisture from the base metal within one inch of the joint before welding. While FCAW tolerates more contamination than GMAW, it is not immune to porosity from severe surface contamination. A quick pass with a grinder or wire wheel takes seconds and prevents hours of repair welding.
Maintain proper stickout distance-excessive electrode extension beyond 1-1/4 inches allows shielding gas to dissipate before reaching the puddle. This applies particularly to gas-shielded wire, where longer stickout reduces effective gas coverage even in calm indoor conditions.
Moisture contamination in flux-cored wire causes hydrogen porosity. Store wire in sealed containers with desiccant and avoid exposure to humidity. If wire has been exposed to moisture, some manufacturers recommend baking at 120-150°C for 6-8 hours to drive off absorbed water. Consult your wire manufacturer's storage and handling recommendations.
Undercut and Insufficient Throat
Undercut-a groove at the toe of the weld-results from excessive heat or incorrect travel angle. In vertical and overhead positions, gravity exacerbates this tendency. The molten base metal flows into the weld puddle, but insufficient filler metal remains at the toe to fill the resulting notch.
Reduce voltage if you see consistent undercut along the weld toes. The lower voltage decreases arc force and base metal melting. Simultaneously, adjust your gun work angle to direct more heat toward the center of the joint rather than the toes.
In vertical-up welding, pause briefly at each toe during your weave or whipping motion. This pause deposits filler metal at the toe and allows the puddle to wet out, filling any tendency toward undercut. The timing requires practice—too short a pause leaves undercut, too long creates excessive buildup and potential slag entrapment.
Insufficient throat depth in fillet welds occurs when welders fail to account for gravity's effect in overhead and vertical positions. The weld metal wants to flow away from the root of the joint. Counter this by directing your arc toward the root throughout the weld, using a work angle slightly biased toward the root (40-50 degrees instead of 45). Add a second pass if necessary to achieve required throat dimension-undersized throats fail code requirements and compromise structural integrity.
Pro Tips From the Field
Experienced welders develop techniques through thousands of feet of production welding. These field-proven practices prevent problems before they start.
Heat Management in Multi-Pass Welding
Monitor inter-pass temperature, particularly in thick-section structural work. Excessive inter-pass temperature causes grain coarsening, reduced toughness, and increased susceptibility to cracking. Most structural steel specifications limit inter-pass temperature to 150-250°C depending on alloy and thickness.
Between passes, verify temperature with temperature-indicating crayons or infrared thermometers. If the steel exceeds maximum inter-pass temperature, wait for cooling before depositing the next pass. This patience costs minutes but prevents costly failures. In cold weather field welding, conversely, preheat may be necessary to prevent hydrogen cracking in high-carbon or alloy steels.
The thermal cycles from multi-pass welding create a progressive tempering effect in previously deposited weld metal. This improves toughness in the final weld but requires managing heat input consistently across all passes. Erratic heat input produces unpredictable microstructures and variable mechanical properties.
Slag Removal Technique
Develop efficient slag removal habits. After completing a weld pass, allow 10-15 seconds of cooling, then strike the bead sharply with a chipping hammer at a shallow angle. The slag should pop off in continuous sections. If slag adheres tenaciously, you may be running too cold-slightly increase voltage for the next pass.
Wire brush perpendicular to the weld axis to remove any remaining slag islands. The brushing motion should be firm and systematic-sloppy brushing misses slag pockets that become inclusions in the next pass. In vertical and overhead positions, remove all spatter within two inches of the joint to prevent it from falling into the weld puddle during subsequent passes.
Consumable Management
Mark your contact tips when installed and replace them after approximately 100 pounds of wire or when visible wear occurs. Worn contact tips create erratic wire feeding and arc instability, particularly problematic in vertical and overhead positions where arc control is critical. Tips are inexpensive compared to the rework caused by wandering arcs.
Maintain proper contact tip recess in the nozzle-typically 1/8 inch recessed for higher amperage applications, flush for lower current work. Incorrect recess changes your effective stickout and alters amperage unpredictably. Check and adjust tip position each time you replace consumables.
Cut wire back 1/4 inch before restarting after any significant pause in welding. The wire end oxidizes and the flux may absorb moisture during the pause, causing arc instability and porosity when you restart. This simple habit prevents start-defect repairs.
Body Mechanics and Endurance
All-position welding, particularly overhead and vertical work, physically fatigues welders faster than flat-position welding. Position yourself to maintain stable gun angles without extended reach or awkward postures. Use scaffolding, ladders, or platforms to bring yourself into proper working position relative to the joint—don't weld overhead while standing on the ground when you could safely elevate yourself to a more comfortable height.
Take brief breaks between passes in overhead work. Sustained overhead welding causes shoulder fatigue that degrades gun control and increases defect rates. A two-minute break every 20 minutes of overhead welding maintains consistency throughout the shift.
Productivity and Quality Balance
All-position FCAW delivers 50 percent faster arc time than stick welding on comparable joints. This speed advantage translates directly to labor cost reduction and schedule compression on large projects. Deposition rates for FCAW range from 8-25 lbs/hr compared to 3-5 lbs/hr for stick welding. In shipbuilding and infrastructure applications where thousands of linear feet require welding, this productivity difference determines project profitability.
However, speed without quality produces rework that erases productivity gains. Modern infrastructure and marine construction specifications require stringent quality control including visual inspection, magnetic particle testing, ultrasonic inspection, and radiographic examination. Welds must pass on first inspection to realize productivity benefits.
The key lies in establishing consistent techniques through deliberate practice. Run test coupons in all positions before production welding. Verify your parameter ranges, confirm proper bead appearance, and validate acceptable mechanical properties through destructive testing when possible. This upfront investment in technique development pays dividends through reduced reject rates and eliminated rework.
Document your qualified parameters-record amperage, voltage, wire feed speed, travel speed, and consumable specifications for each position and joint configuration. These become your personal welding procedures that ensure repeatability across multiple projects and job sites. The welders who consistently pass certification tests and deliver production-quality work maintain these parameter notebooks and reference them religiously.
Conclusion: Deliberate Practice and Continuous Improvement
Mastering all-position FCAW requires more than reading a guide—it demands hundreds of hours of intentional practice in each position. Start with vertical-up welding on readily accessible test plates, establishing the muscle memory for proper gun angles and manipulation techniques. Progress to overhead position only after achieving consistent vertical-up results. Field conditions add complexity that builds on this foundational skill set.
The payoff for developing all-position capability extends throughout your welding career. Shipyards, heavy construction contractors, and maintenance facilities actively seek welders with proven all-position skills. These positions command premium wages because relatively few welders invest the effort to truly master out-of-position techniques. Certification in all-position FCAW opens opportunities in sectors where others cannot compete.
Key actionable takeaways:
· Reduce heat input by 10-15 percent for vertical-up and 15-20 percent for overhead compared to flat-position baseline settings
· Maintain 1/2 to 3/4 inch stickout for standard wire diameters and verify correct polarity before every welding session
· Use self-shielded wire for field conditions with wind; gas-shielded wire for indoor fabrication requiring maximum productivity
· Clean thoroughly between passes and verify inter-pass temperature stays within specified ranges for the base metal
· Practice systematically in controlled conditions before applying techniques on production work
Commit to continuous improvement through regular skills assessment and testing. Video record your technique and review it critically. Seek feedback from certified welding inspectors and senior welders. The welders who separate themselves from average practitioners treat skill development as an ongoing professional obligation, not a one-time achievement. All-position FCAW mastery represents a milestone in that journey—one that delivers immediate returns in employability and long-term value throughout a welding career.
Registered Office
17, Chiman Bagh,
Subhash Marg
Indore (M.P) 452007
India
info@ultrametwelds.com
www.ultrametwelds.com
Plant
D4, Tejas Industrial Park,
Nemawar Road,
Indore (M.P) 452016
India
image from pngtree.com
mig welding wire manufacturer saw flux manufacturer india stainless steel welding wire welding wire suppliers co2 welding wire manufacturers wire welding with argon gas welding manufacturing companies mig welding wire mig wire supplier flux cored wire manufacturerhardfacing welding wirewelding stainless steel with flux core wireflux cored wire suppliersflux cored stainless mig wireflux cored wire manufacturer in indiaflux cored wire manufacturershardfacing welding wirehardfacing flux cored wire
Copyright ©2026 Ultramet Welds Pvt Ltd. All Rights Reserved